


How to Add Reverb in Logic Pro X

Pitchbends
Aug 21, 2022

Reverb is an essential sound effect that can be used to simulate different environments or create a sense of space in your mix. In this tutorial, we'll show you how to add reverb in Logic Pro X so you can start creating your own unique sounds.
Adding Reverb in Logic Pro X
Using built-in presets
There are a few different ways to add reverb in Logic Pro X. The most common way is to use the built-in presets. To do this, simply go to the reverb section of the effects browser and choose a preset that you like. You can also tweak the settings of the preset to get the sound that you're looking for.
To add reverb using built-in Logic Pro X presets:
1. Open Logic Pro X and create a new project.
2. To add reverb, you'll need to insert an audio effect plugin on the track that you want to apply reverb to.
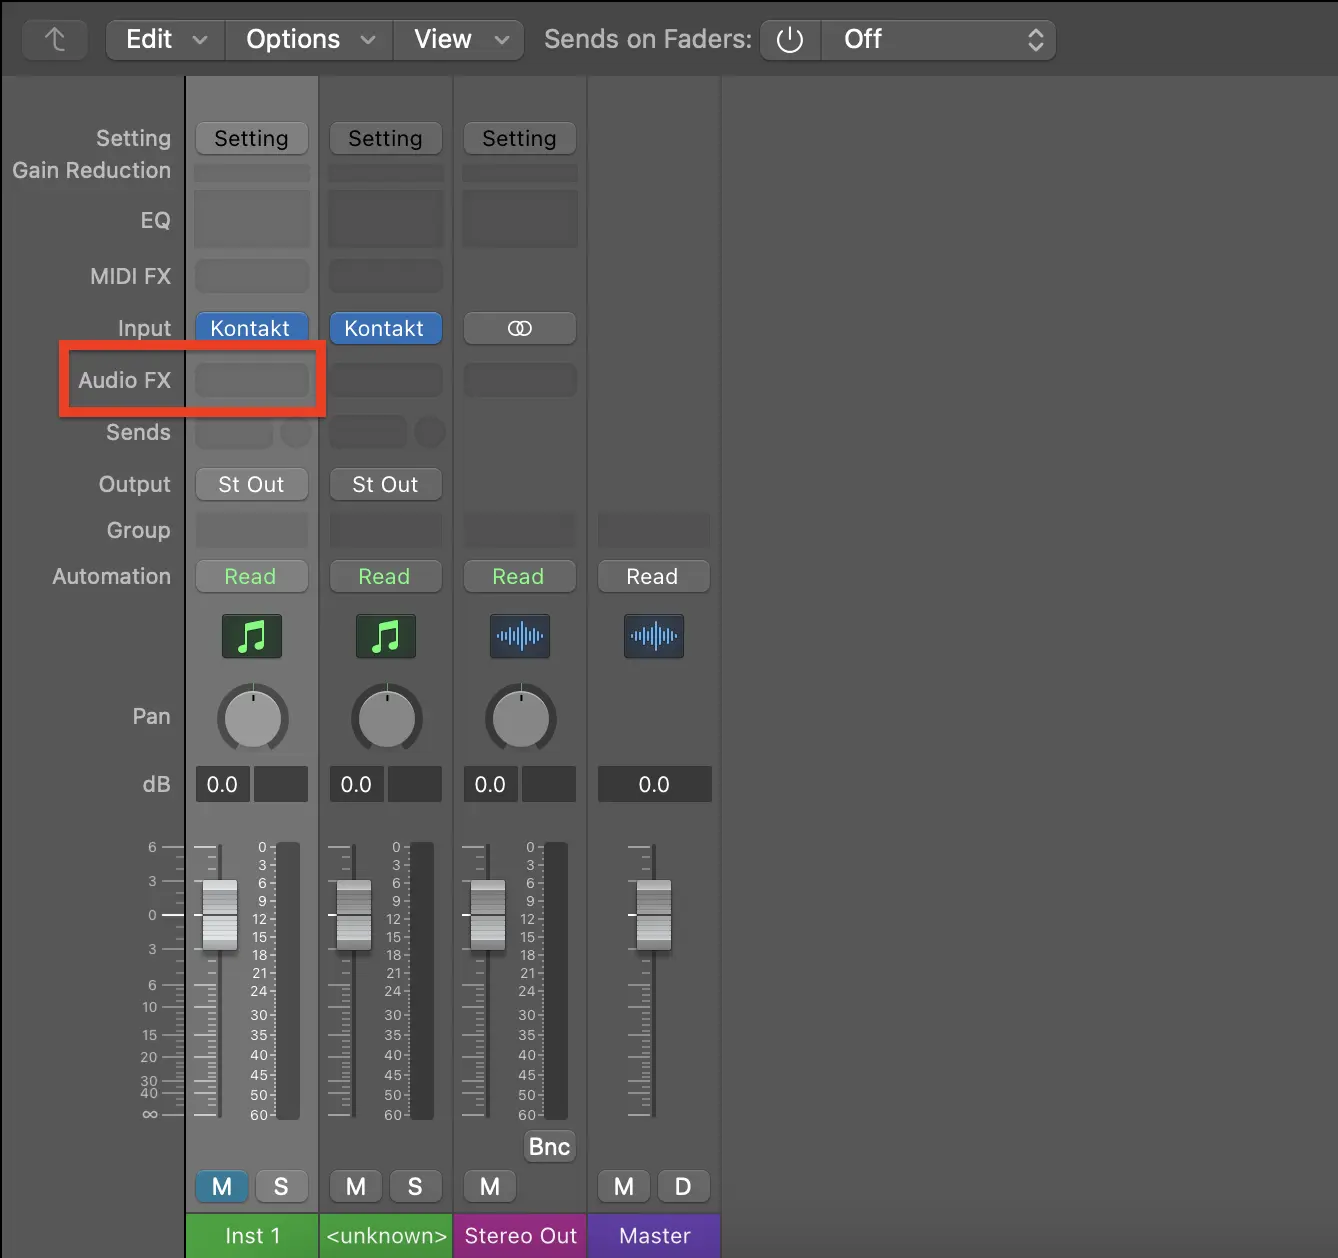
3. Insert an audio effect plugin by clicking the 'Audio FX' button on the track you want to add reverb to in the mixer (you can press ‘x’ on your keyboard to quickly pull up the mixer).
4. Next, select the 'Reverb' option from the dropdown menu.

5. Choose one of the built-in reverb plugins (e.g. Space Designer, SilverVerb or ChromaVerb)
6. Adjust the settings to taste. The most important parameters to adjust are the dry/wet mix, pre-delay, and decay time. Other controls include room size, stereo width, damping, EQ, ADSR (attack, delay, sustain and release) and level parameters.
7. Repeat these steps for each track that you want to add reverb to.
8. That's it! You've now learned how to add reverb in Logic Pro X.
Which built-in reverb plugin should I use?
The most common built-in reverb plugin in Logic Pro X is the Space Designer. Space Designer is a convolution reverb plugin that uses impulse responses to simulate various real-world spaces. To add Space Designer to your track, simply click on the "Effects" tab in the main window and select "Space Designer."
Once you've added Space Designer to your track, you'll need to choose an impulse response preset. Impulse responses are recordings of real-world spaces or artificial environments that can be used to simulated those spaces electronically. Logic Pro X comes with a number of different impulse responses, but you can also find many more online.
Once you've selected an impulse response, you can adjust the parameters of the Effect to taste. The two most important parameters are "Mix" and "Size." The Mix parameter controls how much of the effect is applied to the signal, while the Size parameter controls the duration of the reverberation.
Reverb is a crucial effect for anyone working in Logic Pro X. By using the built-in Space Designer plugin, you can easily add realistic reverberation to your tracks. In no time at all, you'll have professional sounding tracks that wouldn't be out of place in a commercial release.
Using third-party plugins
Another way to add reverb is to use a third-party vst plug-in. This is third-party software that you can install on your computer to add more features to Logic Pro X. There are many different types of reverb vst plug-ins, but if you’re looking for a good all-rounder, we recommend using a convolution reverb. Convolution reverbs are designed to simulate the sound of real-world environments, such as halls, churches, or rooms.
To install third-party reverb plugins in Logic Pro X:
1. Open Logic Pro X and go to the Preferences menu.
2. Click on the Plug-Ins tab.
3. Make sure that the "Allow AU plug-ins" and "Scan for new plug-ins" options are checked.
4. Close the Preferences window.
5. Quit Logic Pro X and relaunch the application.
6. Go to the Audio Unit Manager located in the Studio menu.
7. Click on the "Scan for New Plug-Ins" button.
8. Now that your third-party plugins are installed, you can start using them in your productions.
View our guide to installing third-party Logic Pro X plugins for more details.
To apply third-party reverb plugins in Logic Pro X:
1. Click the 'Audio FX' button on the track you’d like to add reverb to.
2. Select ‘Audio Units’ at the bottom of the dropdown menu.
3. This contains the list of all the third-party plugins you have installed. Select the reverb plugin you’d like to apply to the track. If you do not see it here, it might not be installed correctly.
4. In the reverb plugin, tweak the settings how you’d like until you’re happy with the reverb.
Conclusion
Reverb is a powerful sound effect that can be used to create a sense of space or simulate different environments. In this tutorial, we showed you how to add reverb in Logic Pro X so you can start experimenting with different settings and see what works best for your music. As always, happy producing!
Related posts
You may also like


.svg)


.svg)


.svg)


.svg)
Do you like our stuff? Subscribe.
Newsletter

An error has occurred somewhere and it is not possible to submit the form. Please try again later or contact us.

Three main reasons to sign up for our newsletter